How the setup is wired

- The target hardware — the device that will permanently run the Nexalis Agent, mounted in its enclosure (e.g. a Compulab IOTG, see Supported hardware).
- The onboarding device — a small single-board computer (a Raspberry Pi) supplied by Nexalis that runs the Nexalis Flash firmware. It does the actual flashing and advertises itself over Bluetooth.
- Your phone — running the Nexalis Flash app (iOS or Android), which drives the whole flow.
Supported hardware
The Nexalis Agent runs on standard x86 and ARM industrial edge hardware, so in many cases you can reuse hardware you already have — there’s no need to buy a brand-new device for every deployment. When you do need to provision new hardware, the model we recommend is the Compulab IOTG-IMX8PLUS-C1800QM-D2-N16-WB-TIC:- Based on the NXP i.MX 8M Plus (ARM), fanless and DIN-rail mountable.
- 2 GB RAM / 16 GB eMMC, Wi-Fi + Ethernet — comfortably above the Nexalis Agent baseline.
- Unit cost under $500, which makes it a cost-effective default for most sites.
The Compulab IOTG is our reference device, but the onboarding flow is not limited to it. The Nexalis Agent also runs on industrial computers from Advantech, OnLogic and other mainstream x86/ARM vendors. If you plan to use a different model, confirm compatibility with the Nexalis team first, then follow the same steps below. See also Technical requirements.
What you need
Before you start, make sure you have:- The target hardware, installed in its enclosure and ready to be connected.
- The onboarding device (Raspberry Pi running Nexalis Flash) and its power supply.
- The micro-USB cable that links the onboarding device to the target hardware.
- A phone with the Nexalis Flash app installed and Bluetooth enabled.
- A Nexalis account — or create one directly in the app (steps 1–3).
Install the Nexalis Flash app
Download Nexalis Flash from the App Store (iOS) or Google Play (Android) and grant it Bluetooth permission when prompted — the app cannot find the onboarding device without it.Step-by-step
1. Log in (or sign up)
Open the app to reach the landing page. Sign in with your Nexalis account email and password. Don’t have an account yet? Tap Sign up to create one (steps 2–3), then come back here to log in.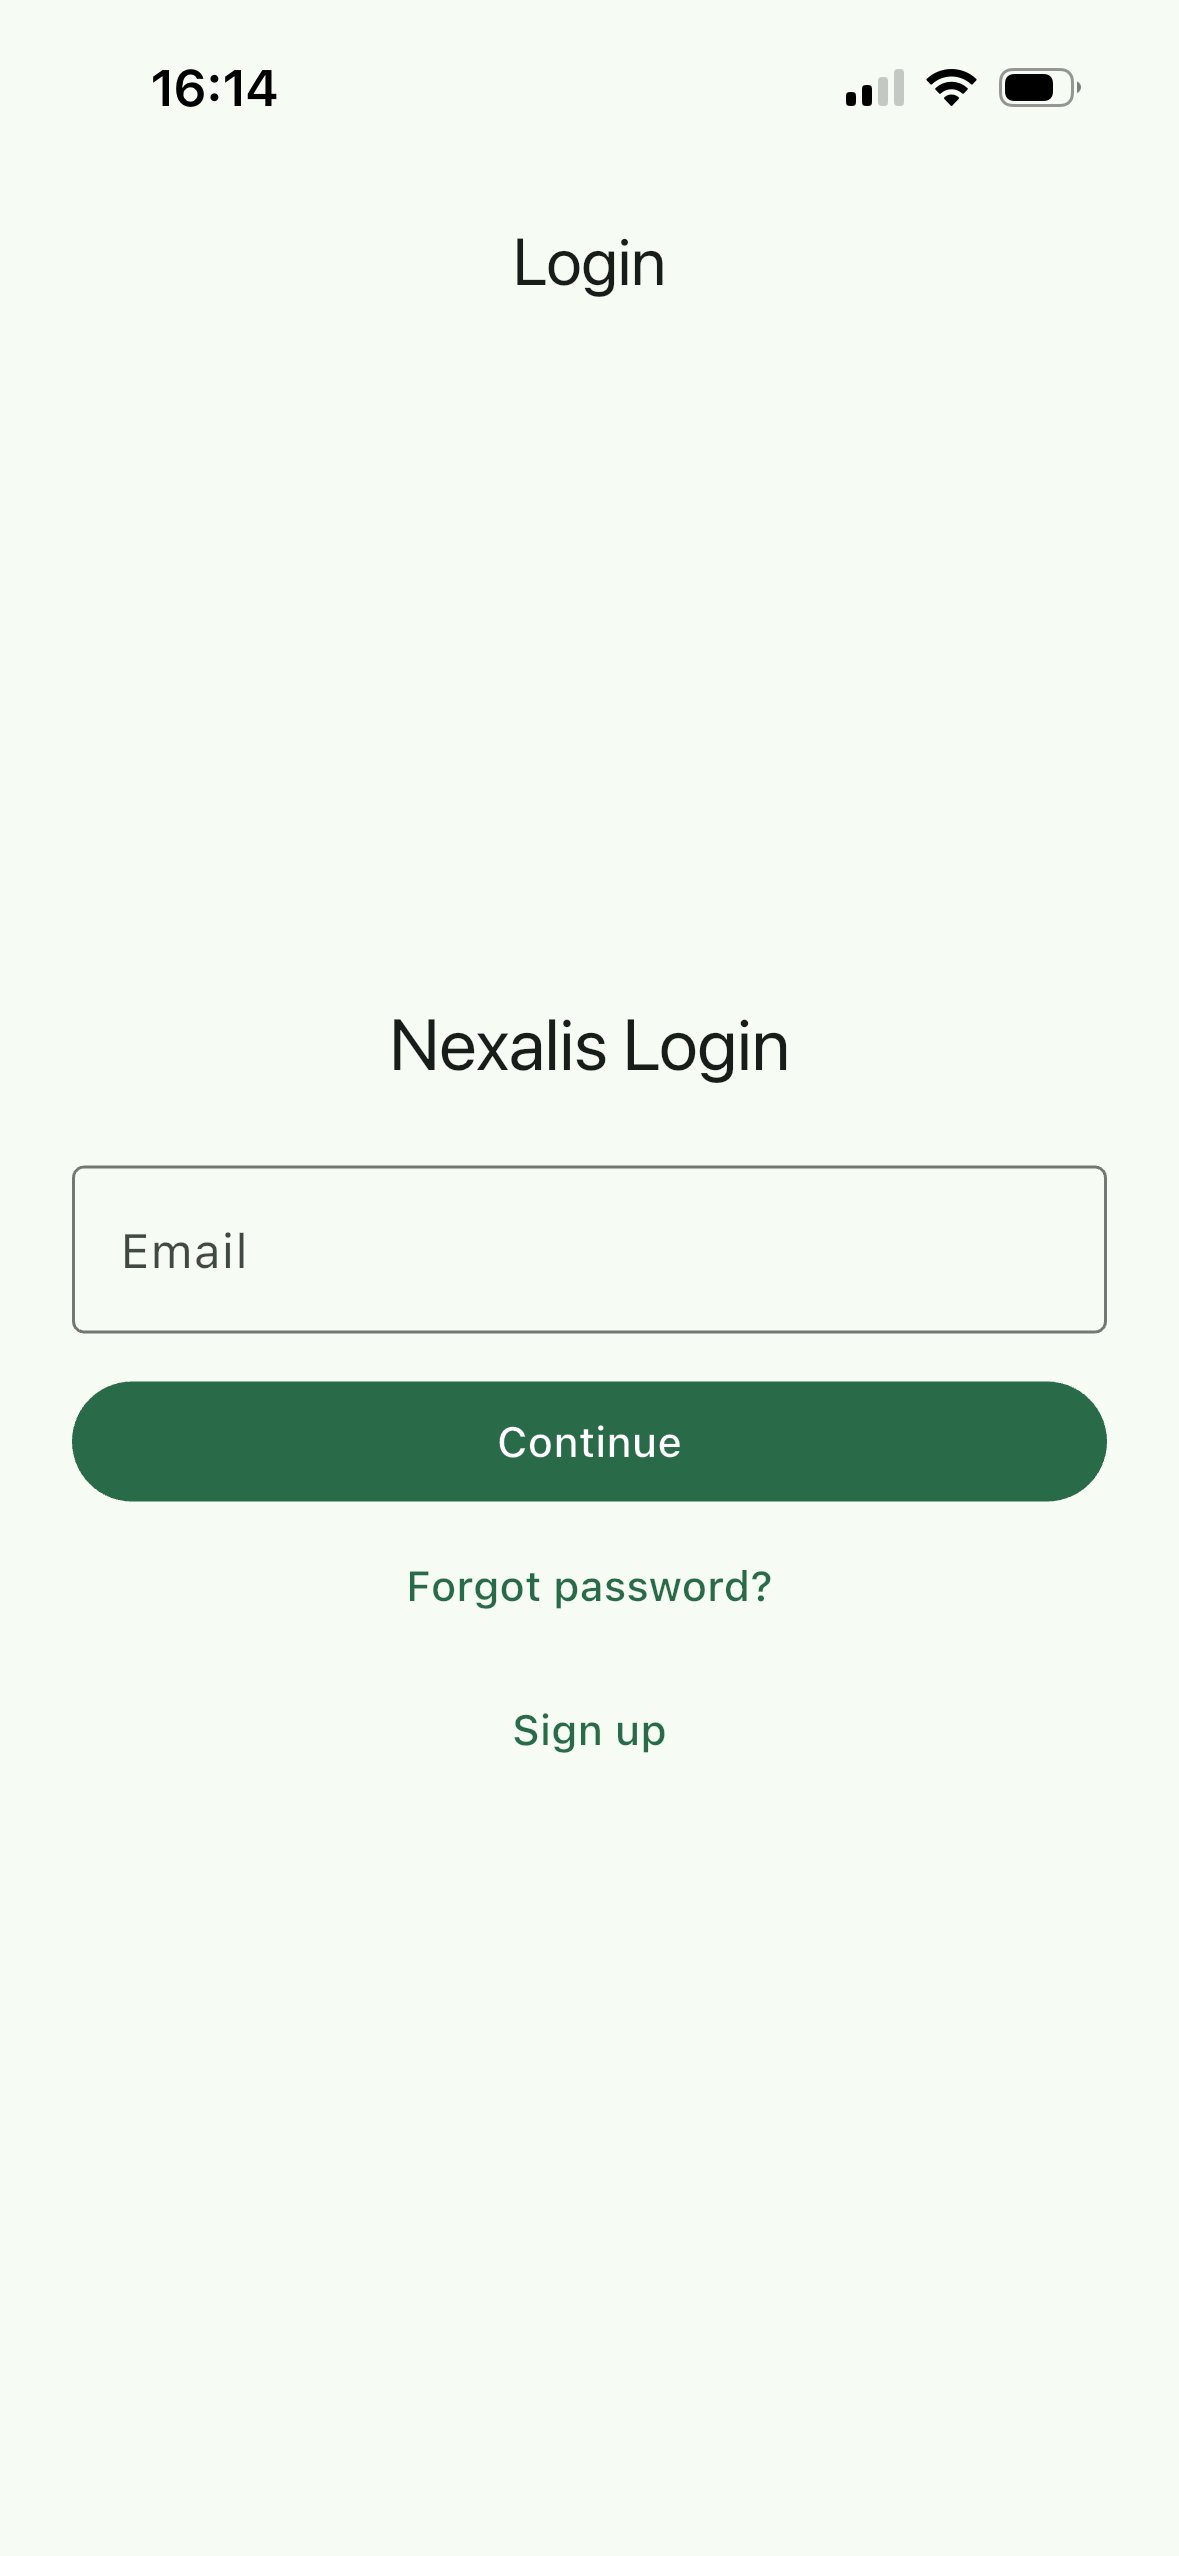
2. Create an account (first time only)
On the Sign up screen, enter your email and a password, then tap Create account.
3. Confirm your email
Enter the confirmation code sent to your email address and tap Confirm and continue, then return to the landing page to log in.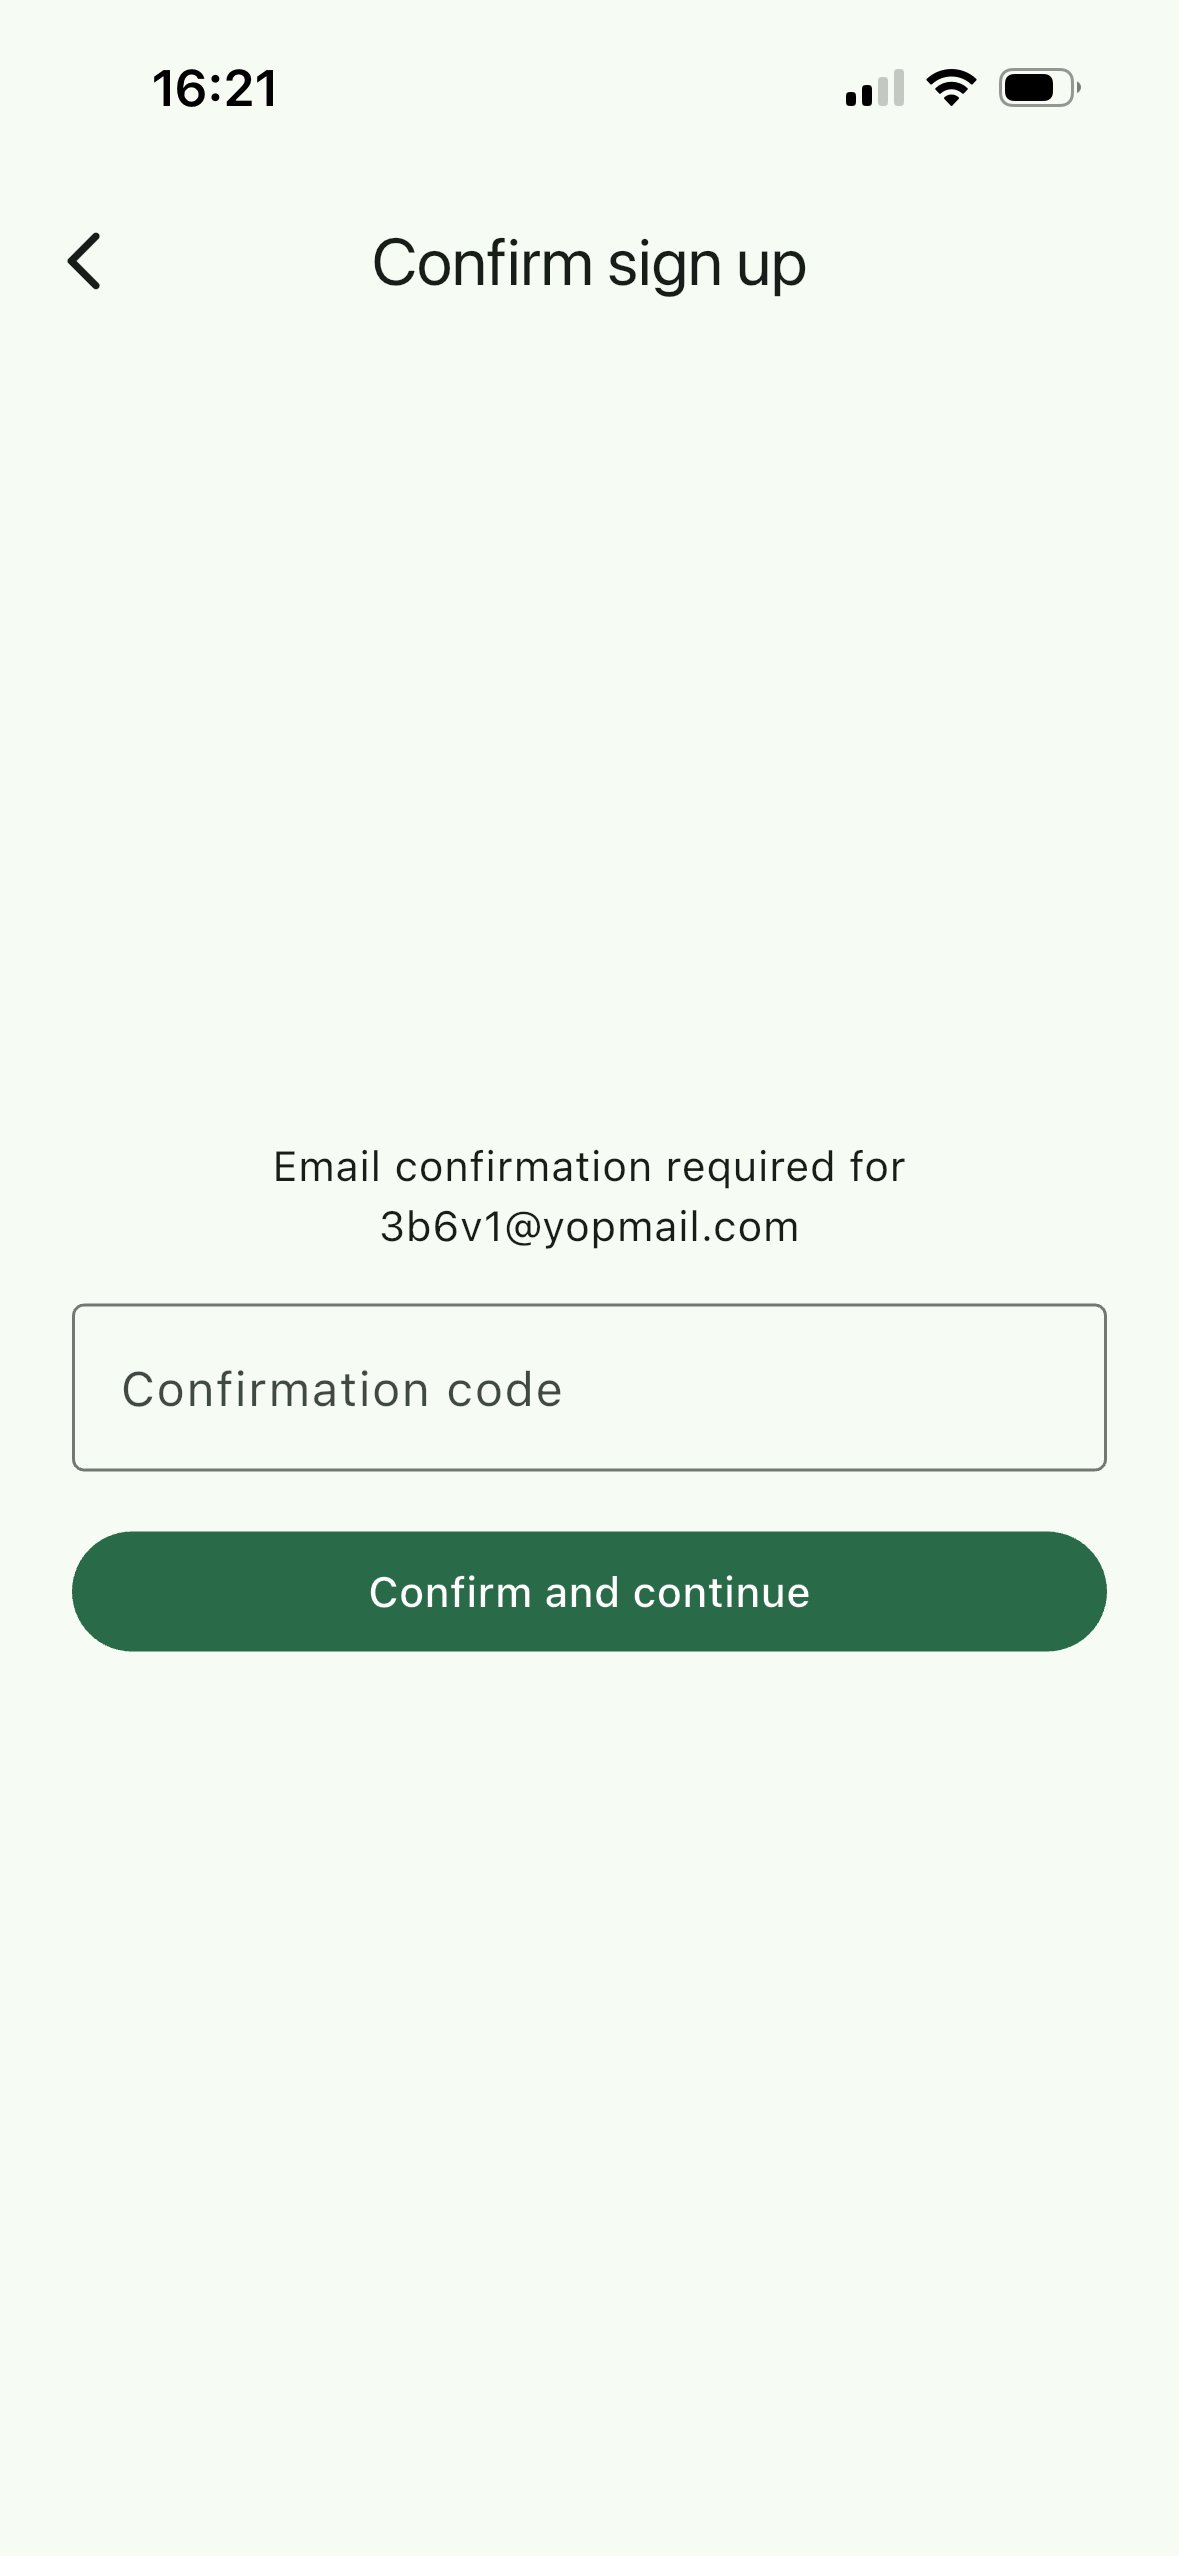
4. Power the onboarding device
Connect the onboarding device to its power supply and wait a few seconds for it to boot. It then broadcasts a Bluetooth network named “Nexalis Flash” — this is the network your phone will scan for and pair with in steps 6–7. Keep the device close to your phone and make sure Bluetooth is on.Connecting happens in two stages. First you detect and select the onboarding device inside the app (steps 5–6). Then, when the app prompts you, you open your phone’s Settings → Bluetooth yourself to do the actual pairing (step 7), and return to the app. You don’t pair from phone Settings until the app asks you to.
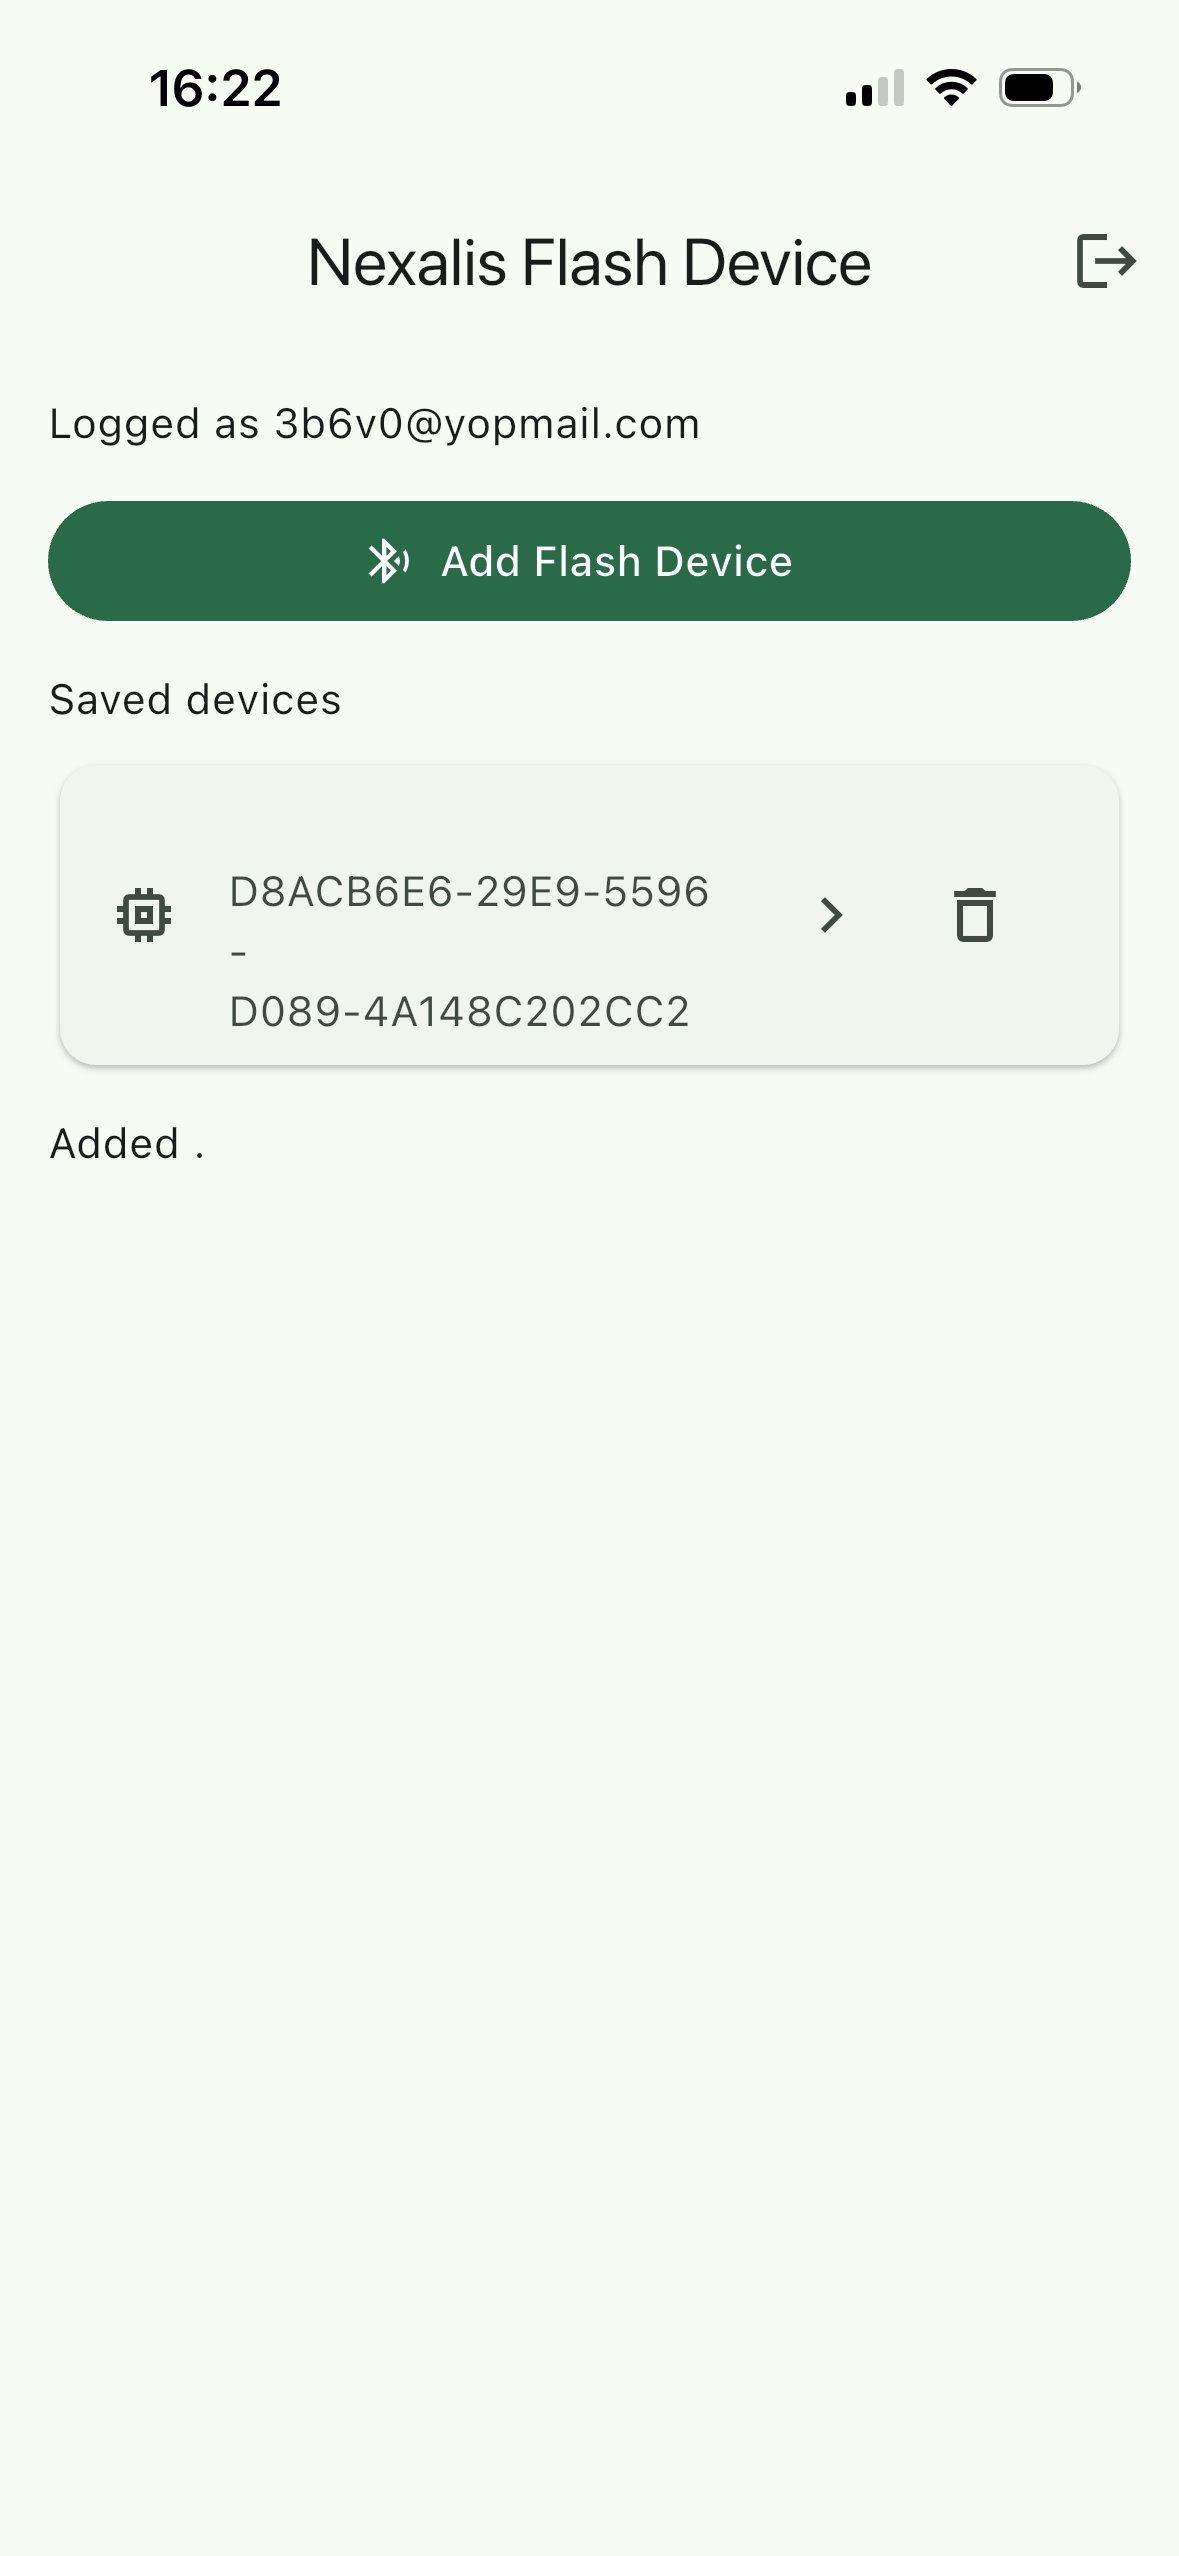
5. Open the Flash Device screen
Once logged in you land on the Nexalis Flash Device screen. Tap Add Flash Device to detect a new onboarding device, or — if you’ve used one before — select it directly from the Saved devices list and skip to step 7.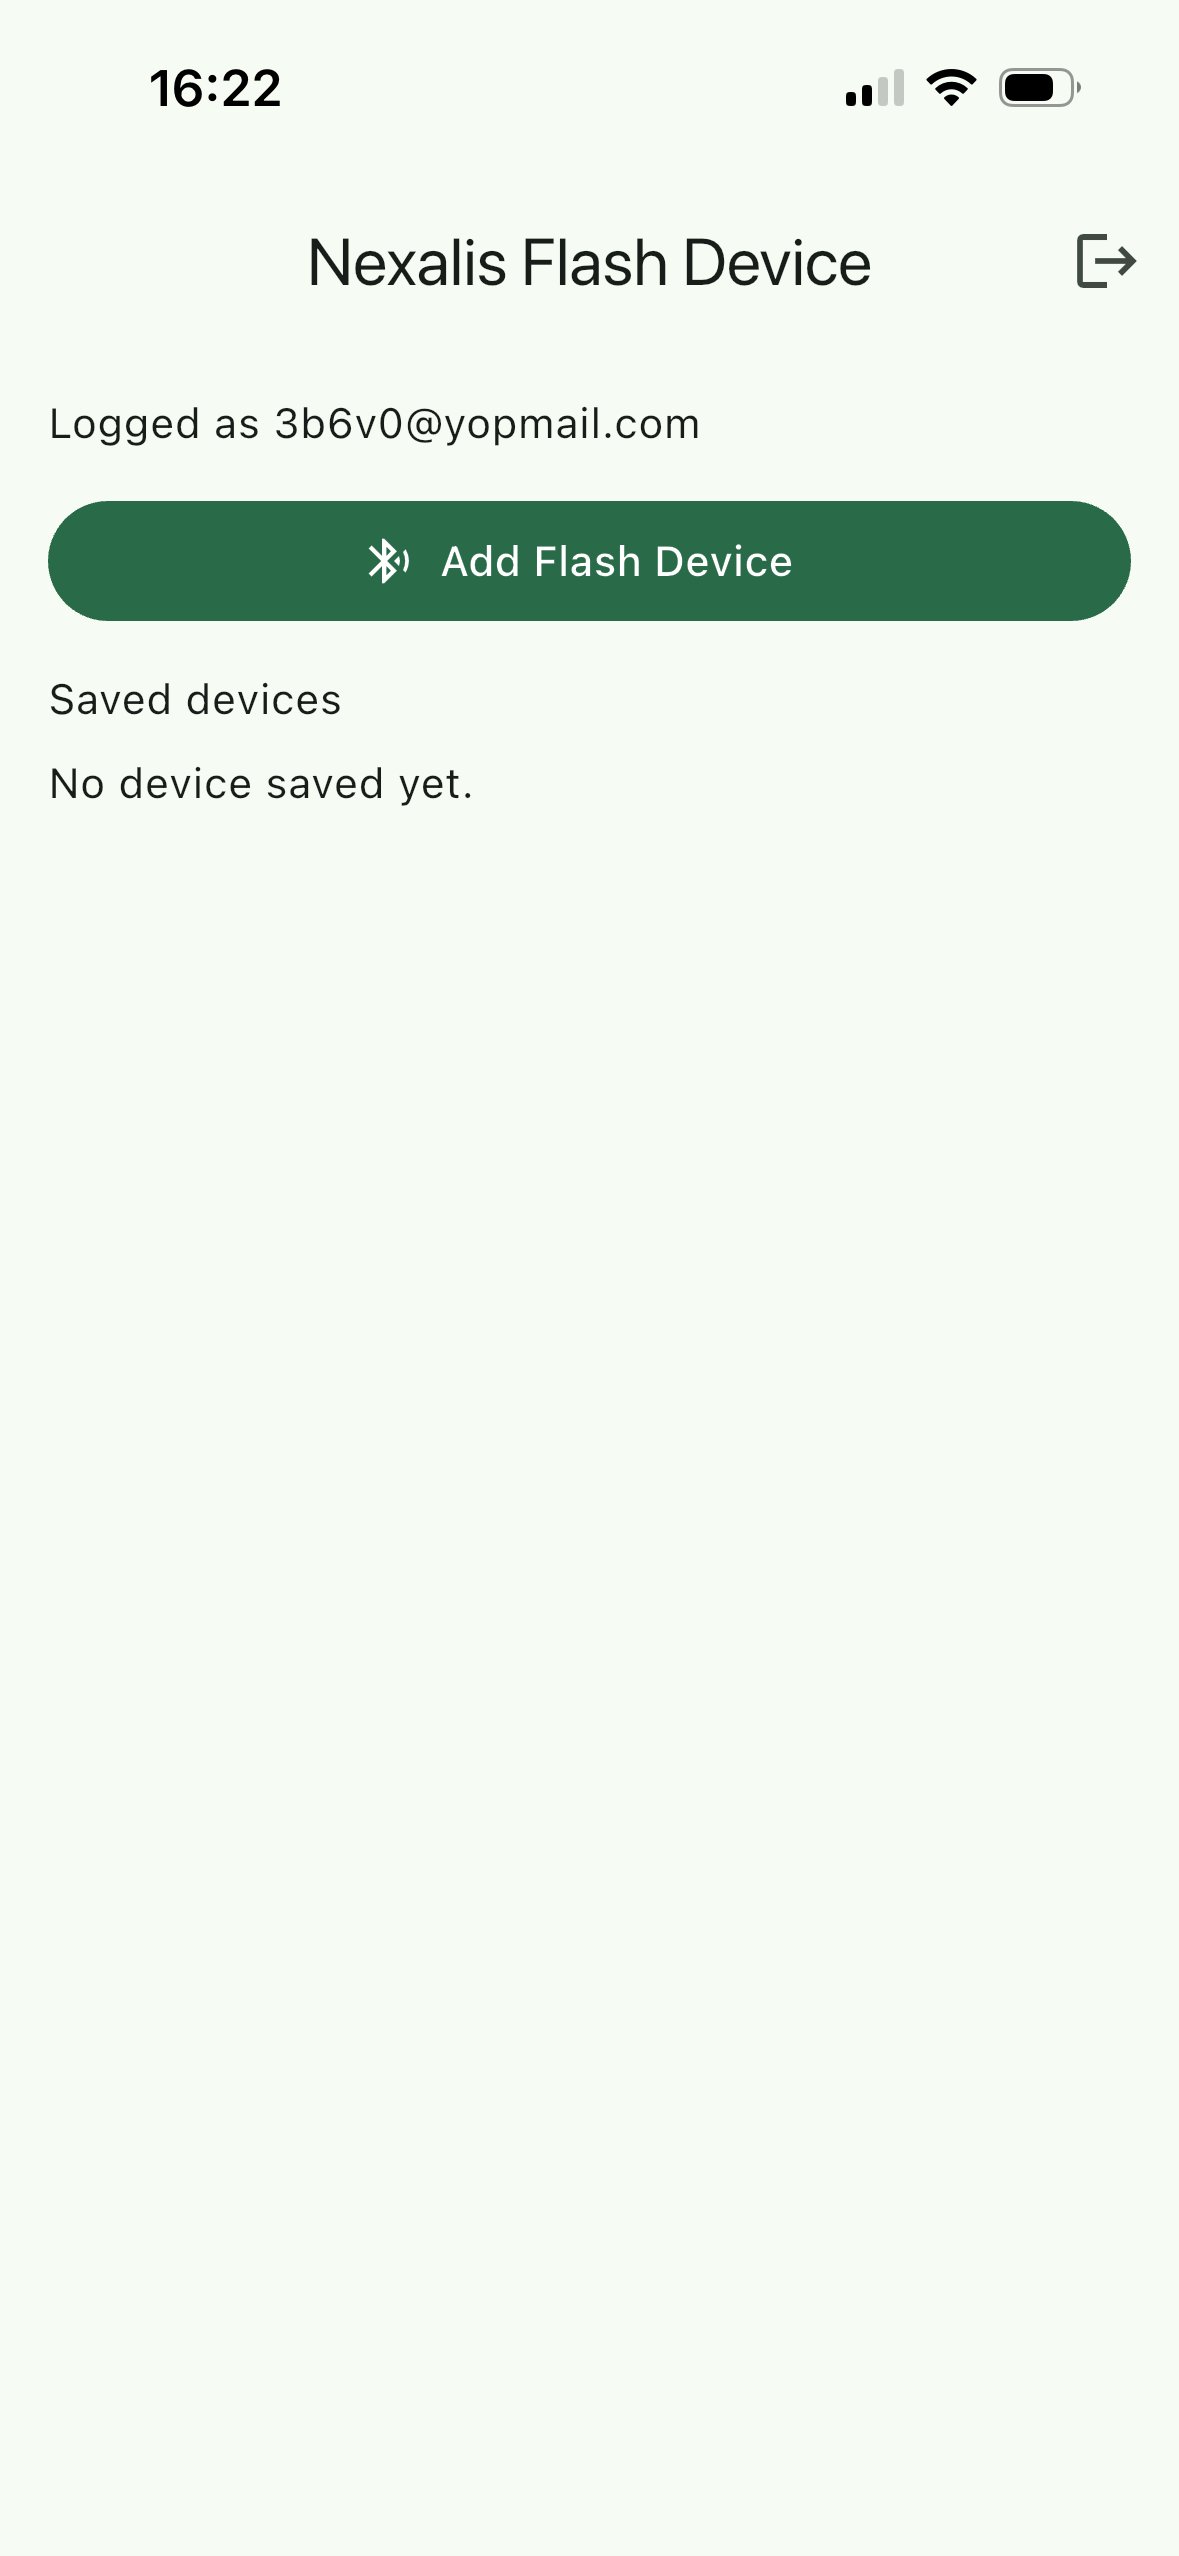
6. Scan and select the onboarding device
The app scans for nearby Flash devices. When the onboarding device appears (shown with its signal strength and identifier), tap it to select it.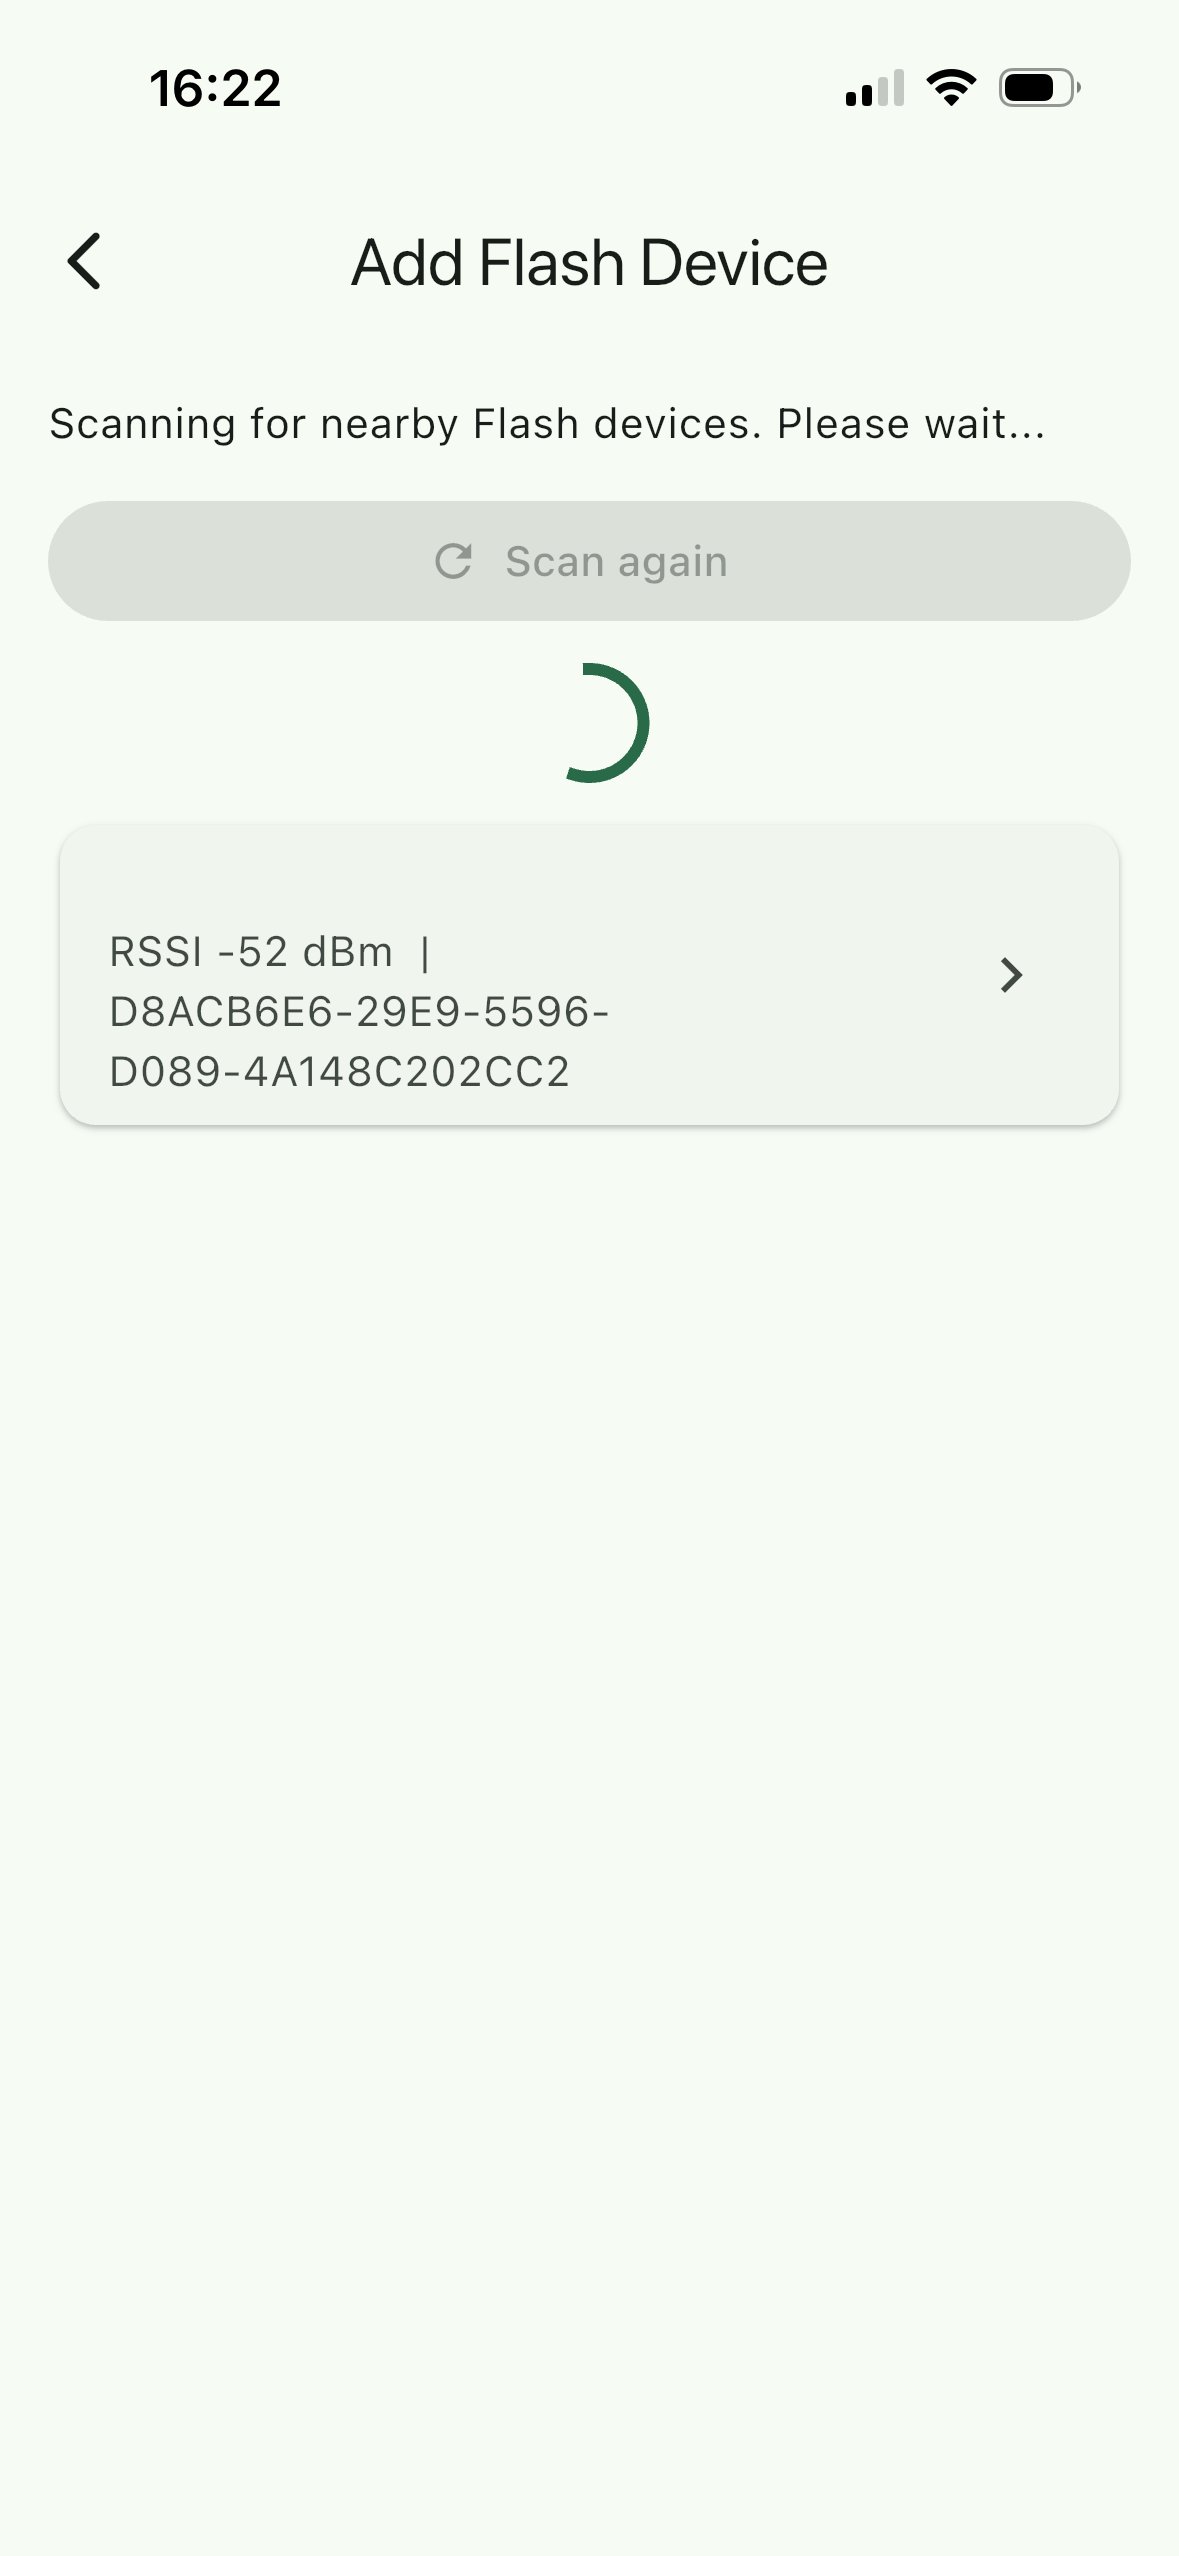
7. Pair over Bluetooth
Tap the saved device. The app asks you to pair Nexalis Flash in your phone’s Settings → Bluetooth, then return to the app. Open your phone’s Bluetooth settings, pair with the device, come back and tap Continue after pairing.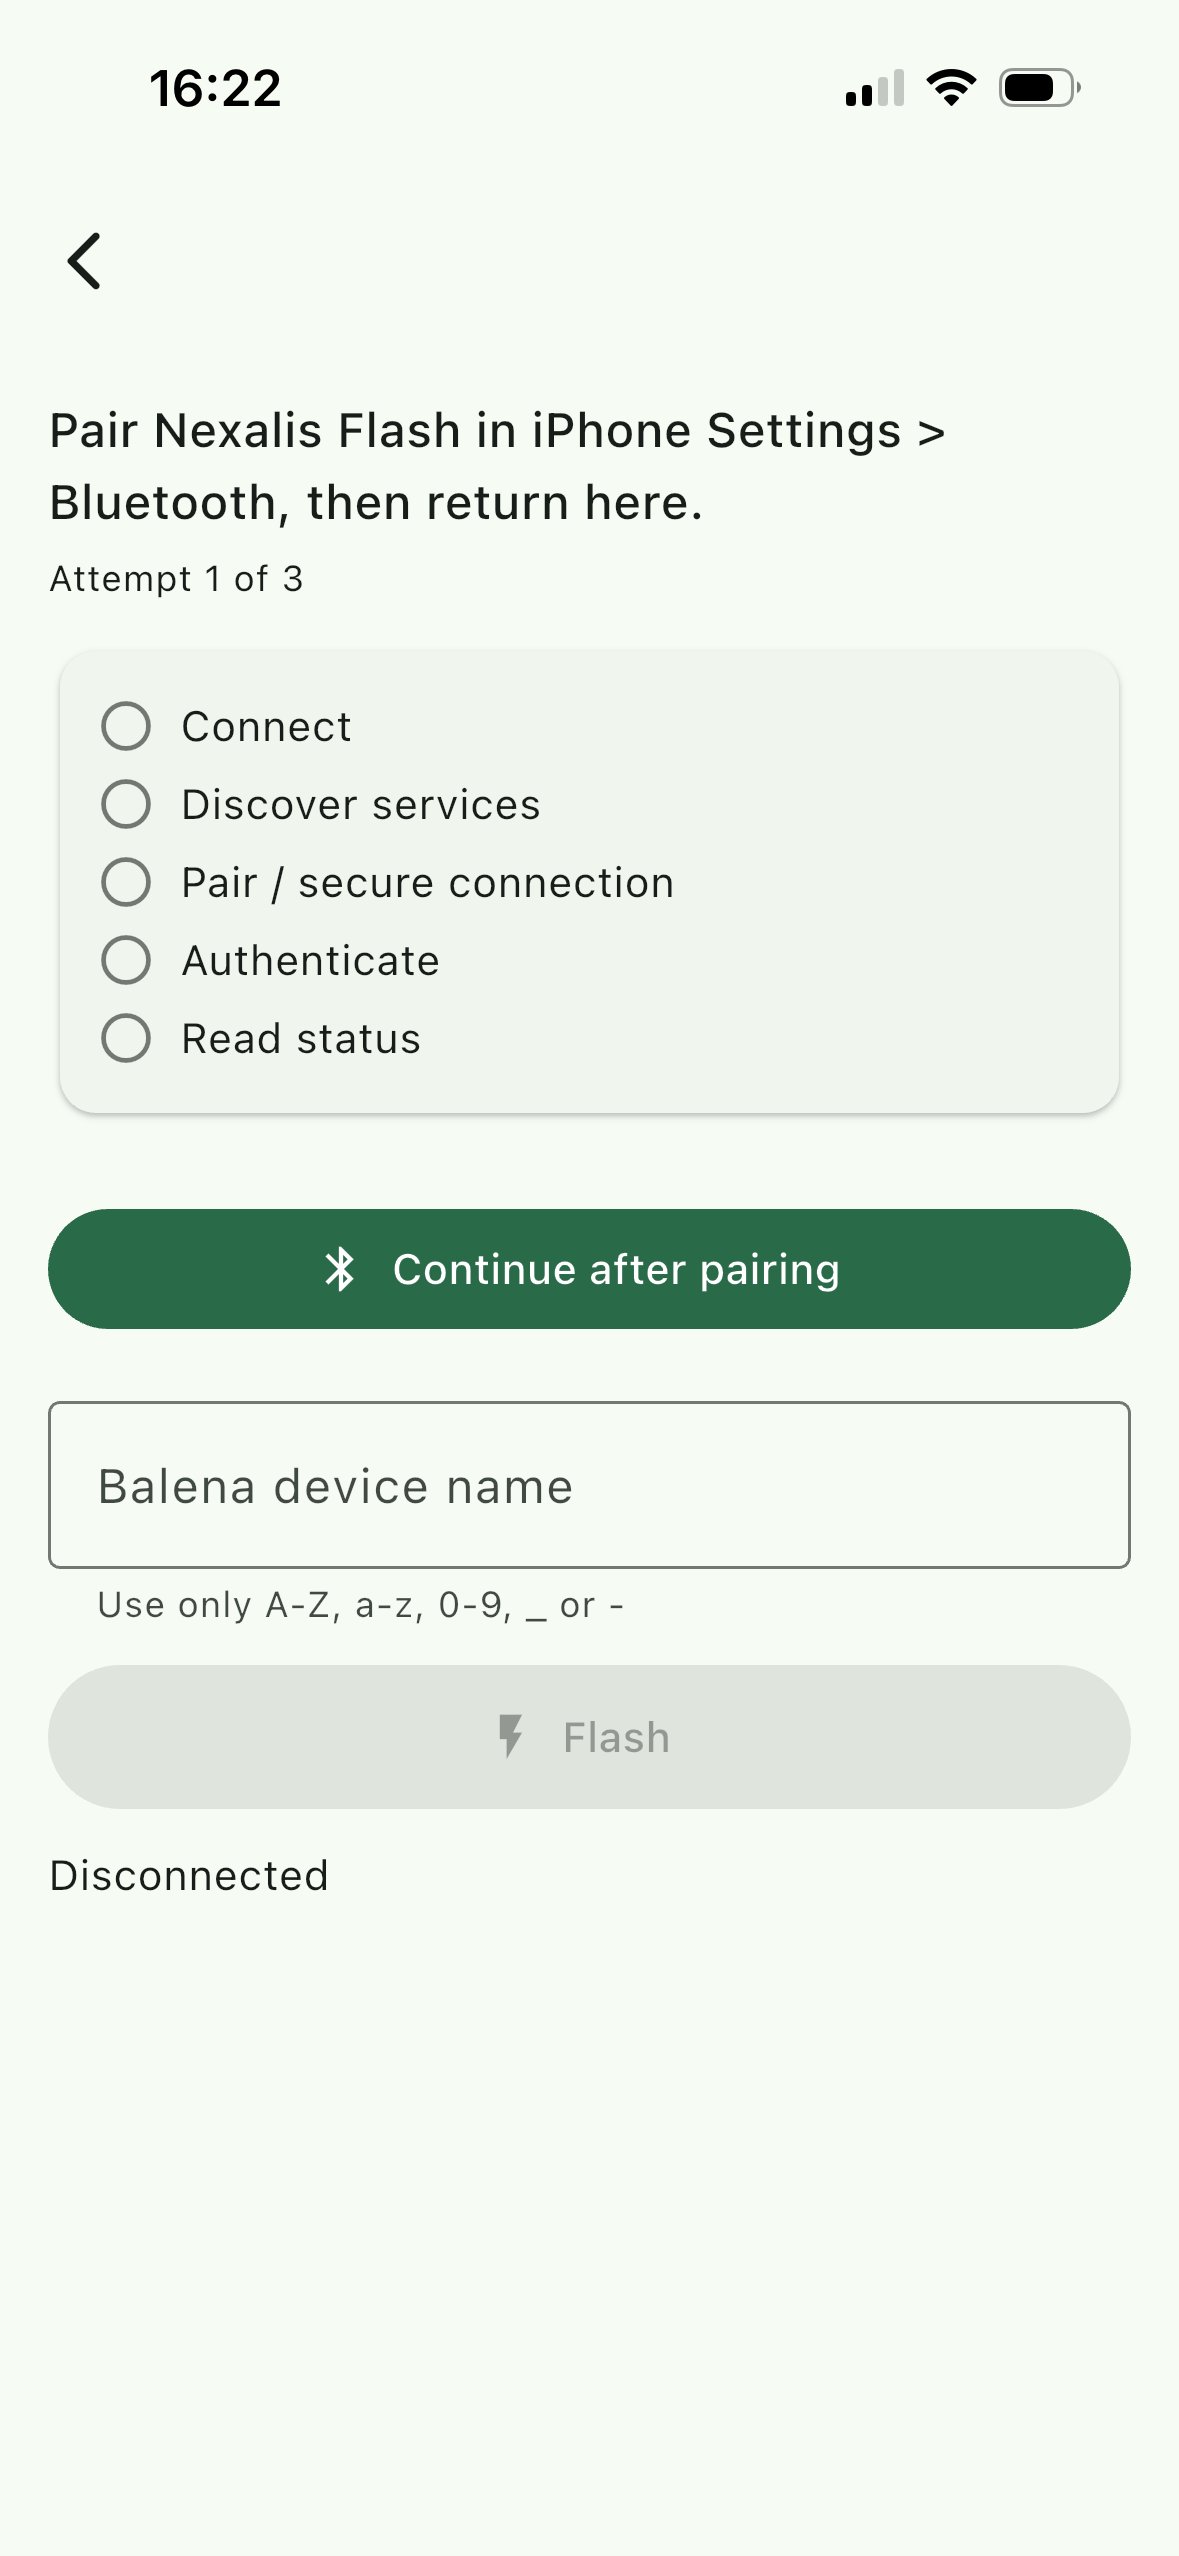
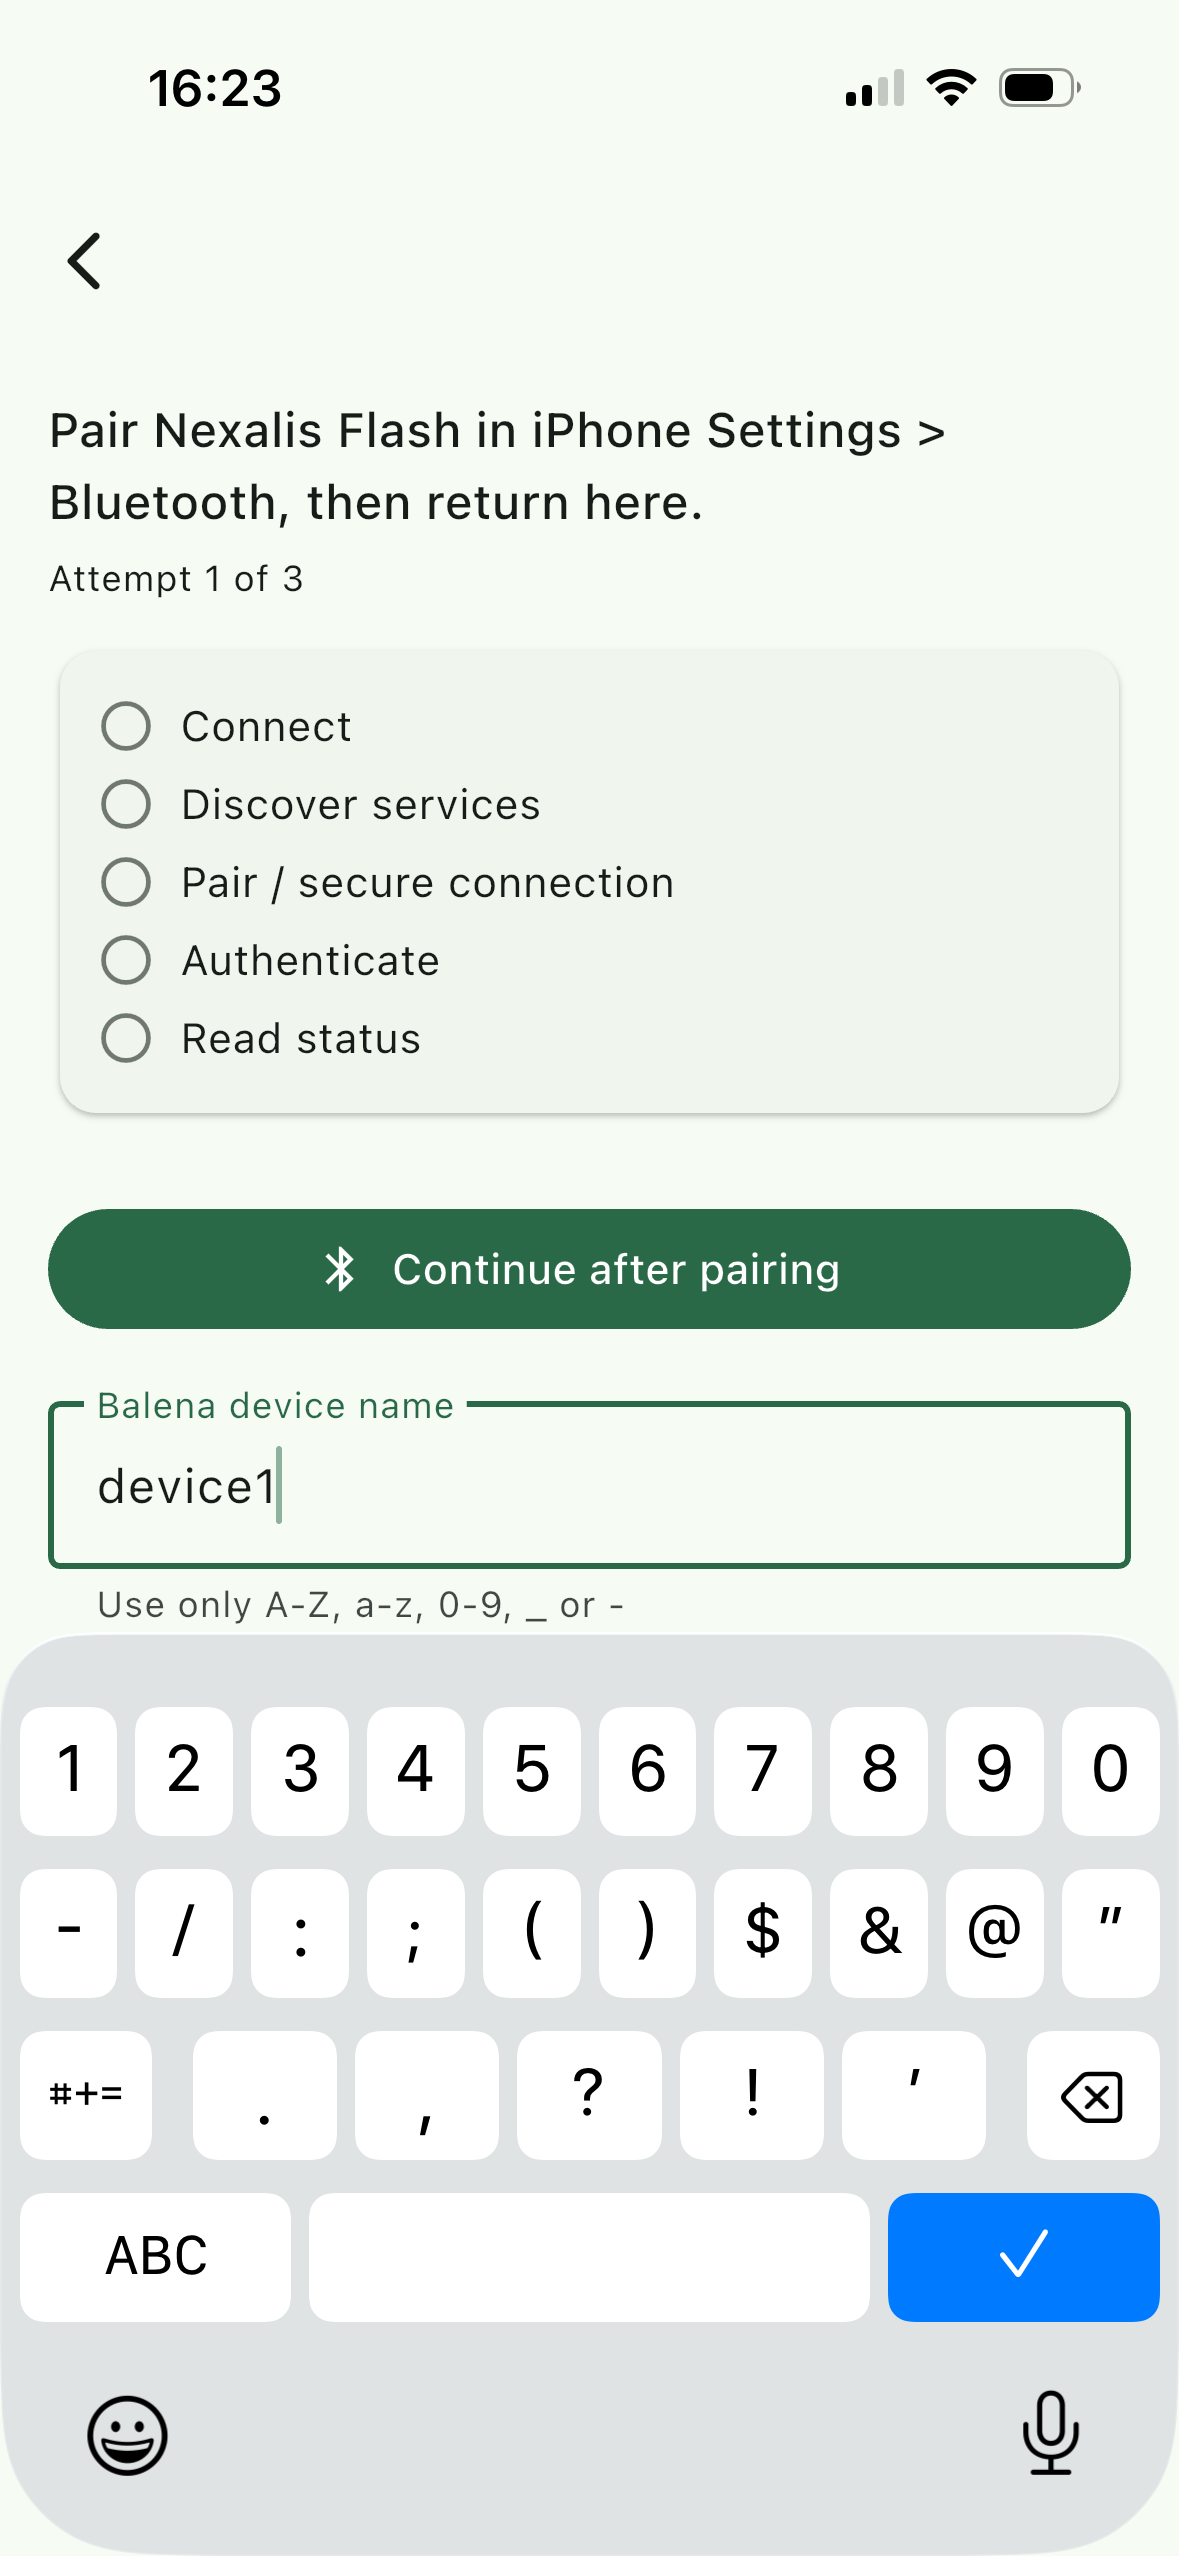
8. Name the device
Enter a device name for the new hardware. This is the name the device will have in Nexalis Edge Manager, so choose something recognizable (for example the site or asset name). Use only letters, numbers,_ or -.
9. Connect the target hardware
When the app shows “Bluetooth ready. Waiting for a USB device to flash.”, connect the target hardware to the onboarding device using the micro-USB cable, and power on the target hardware.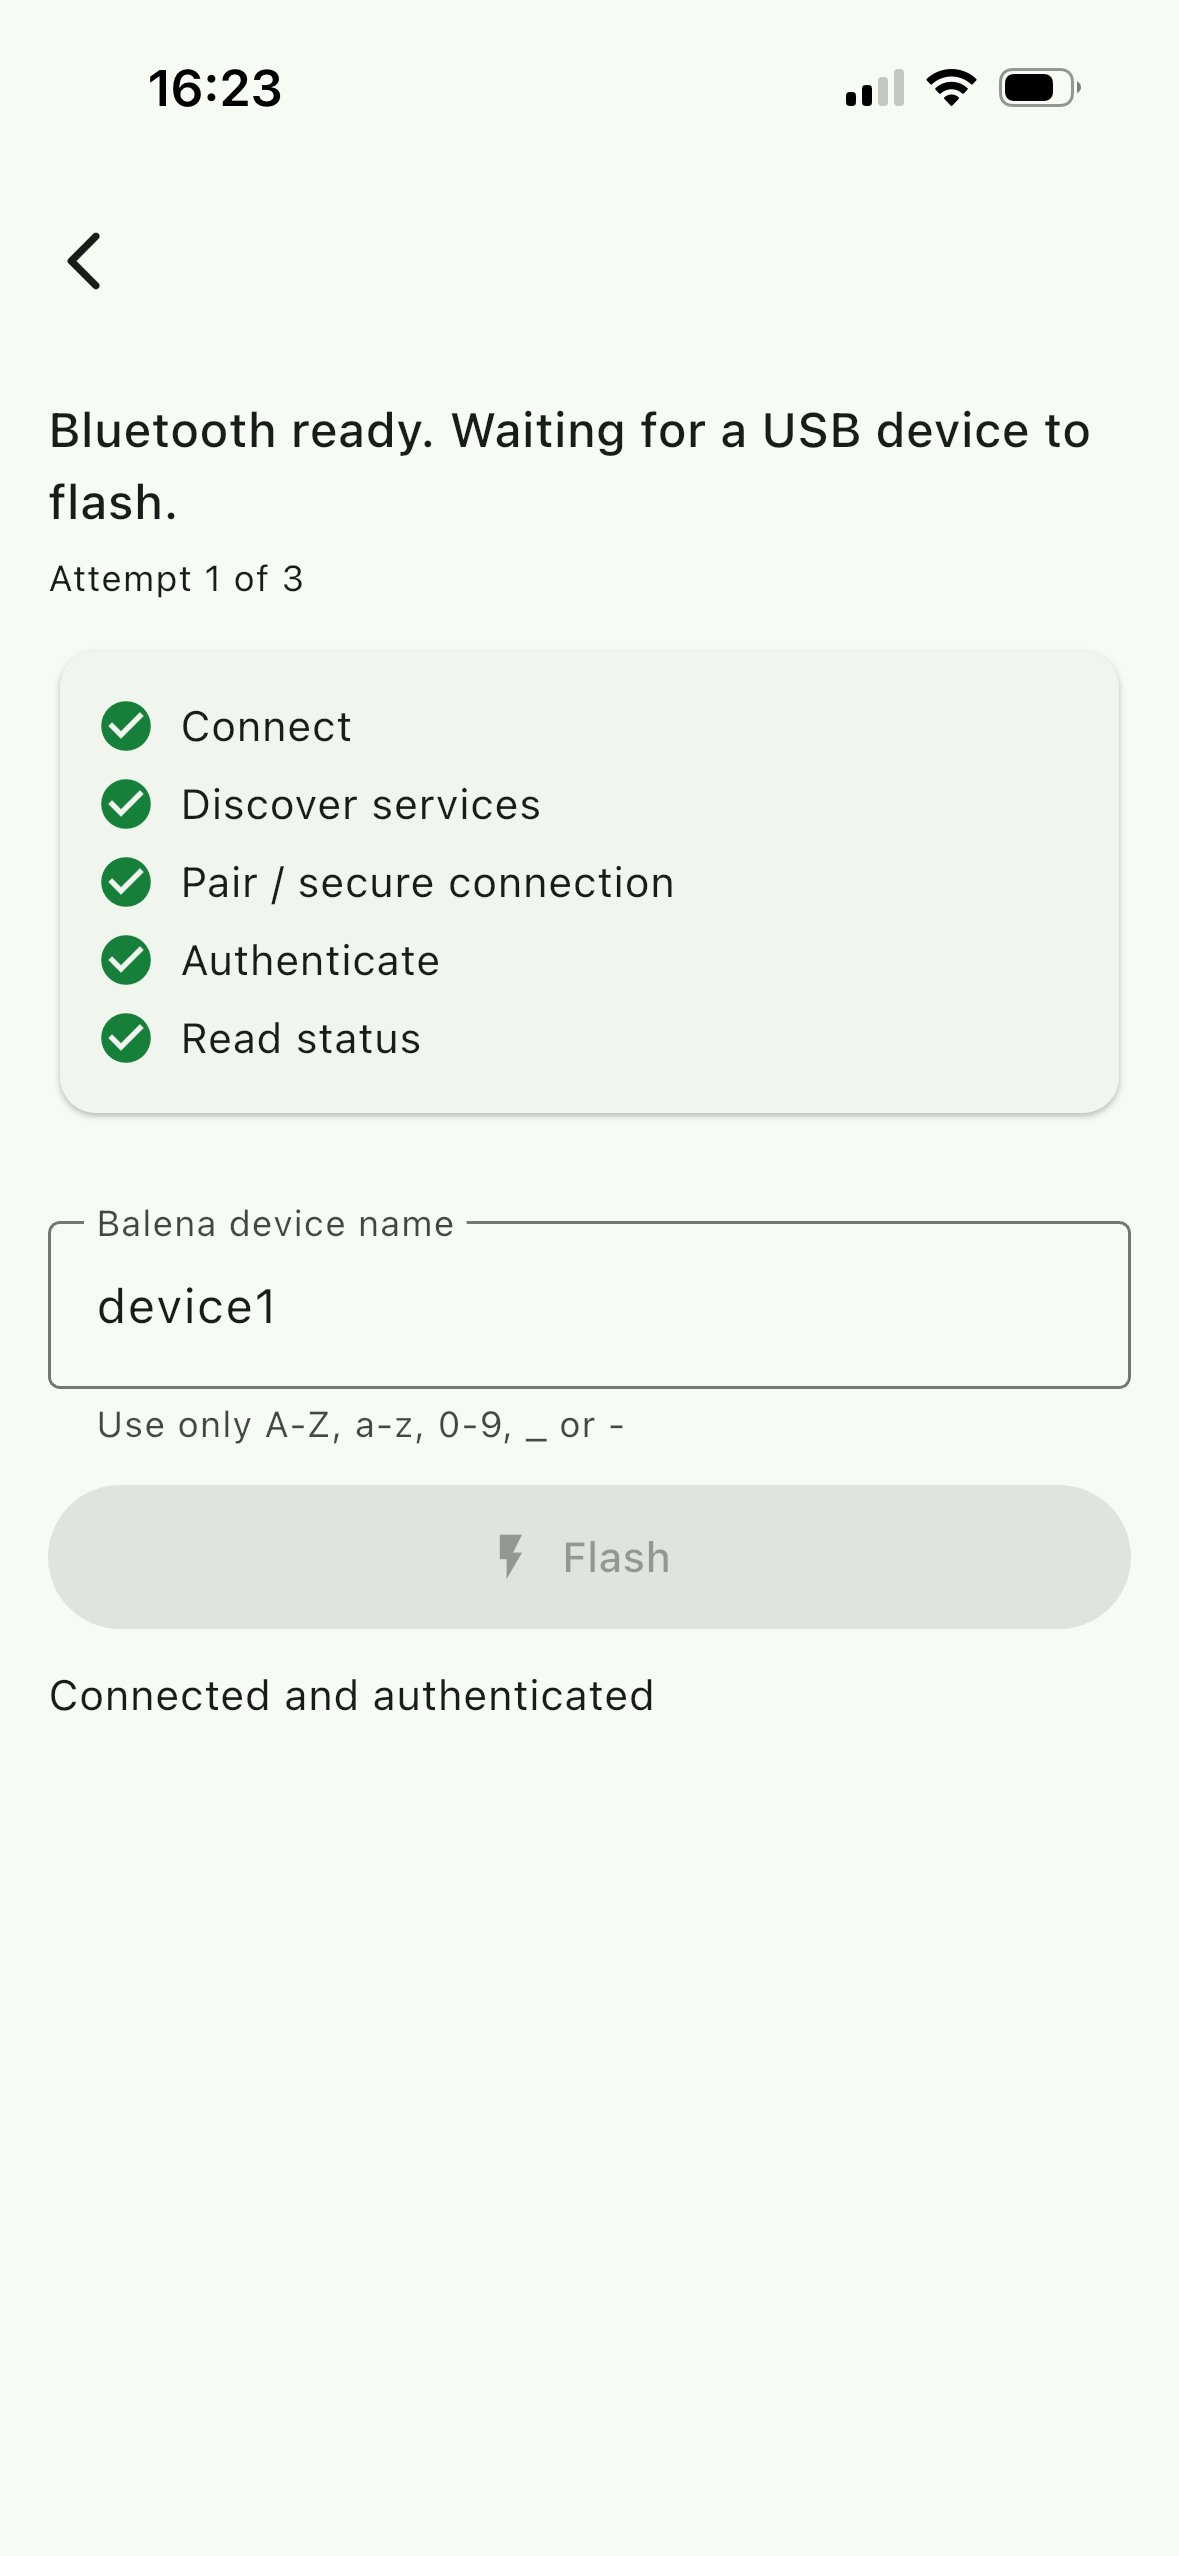
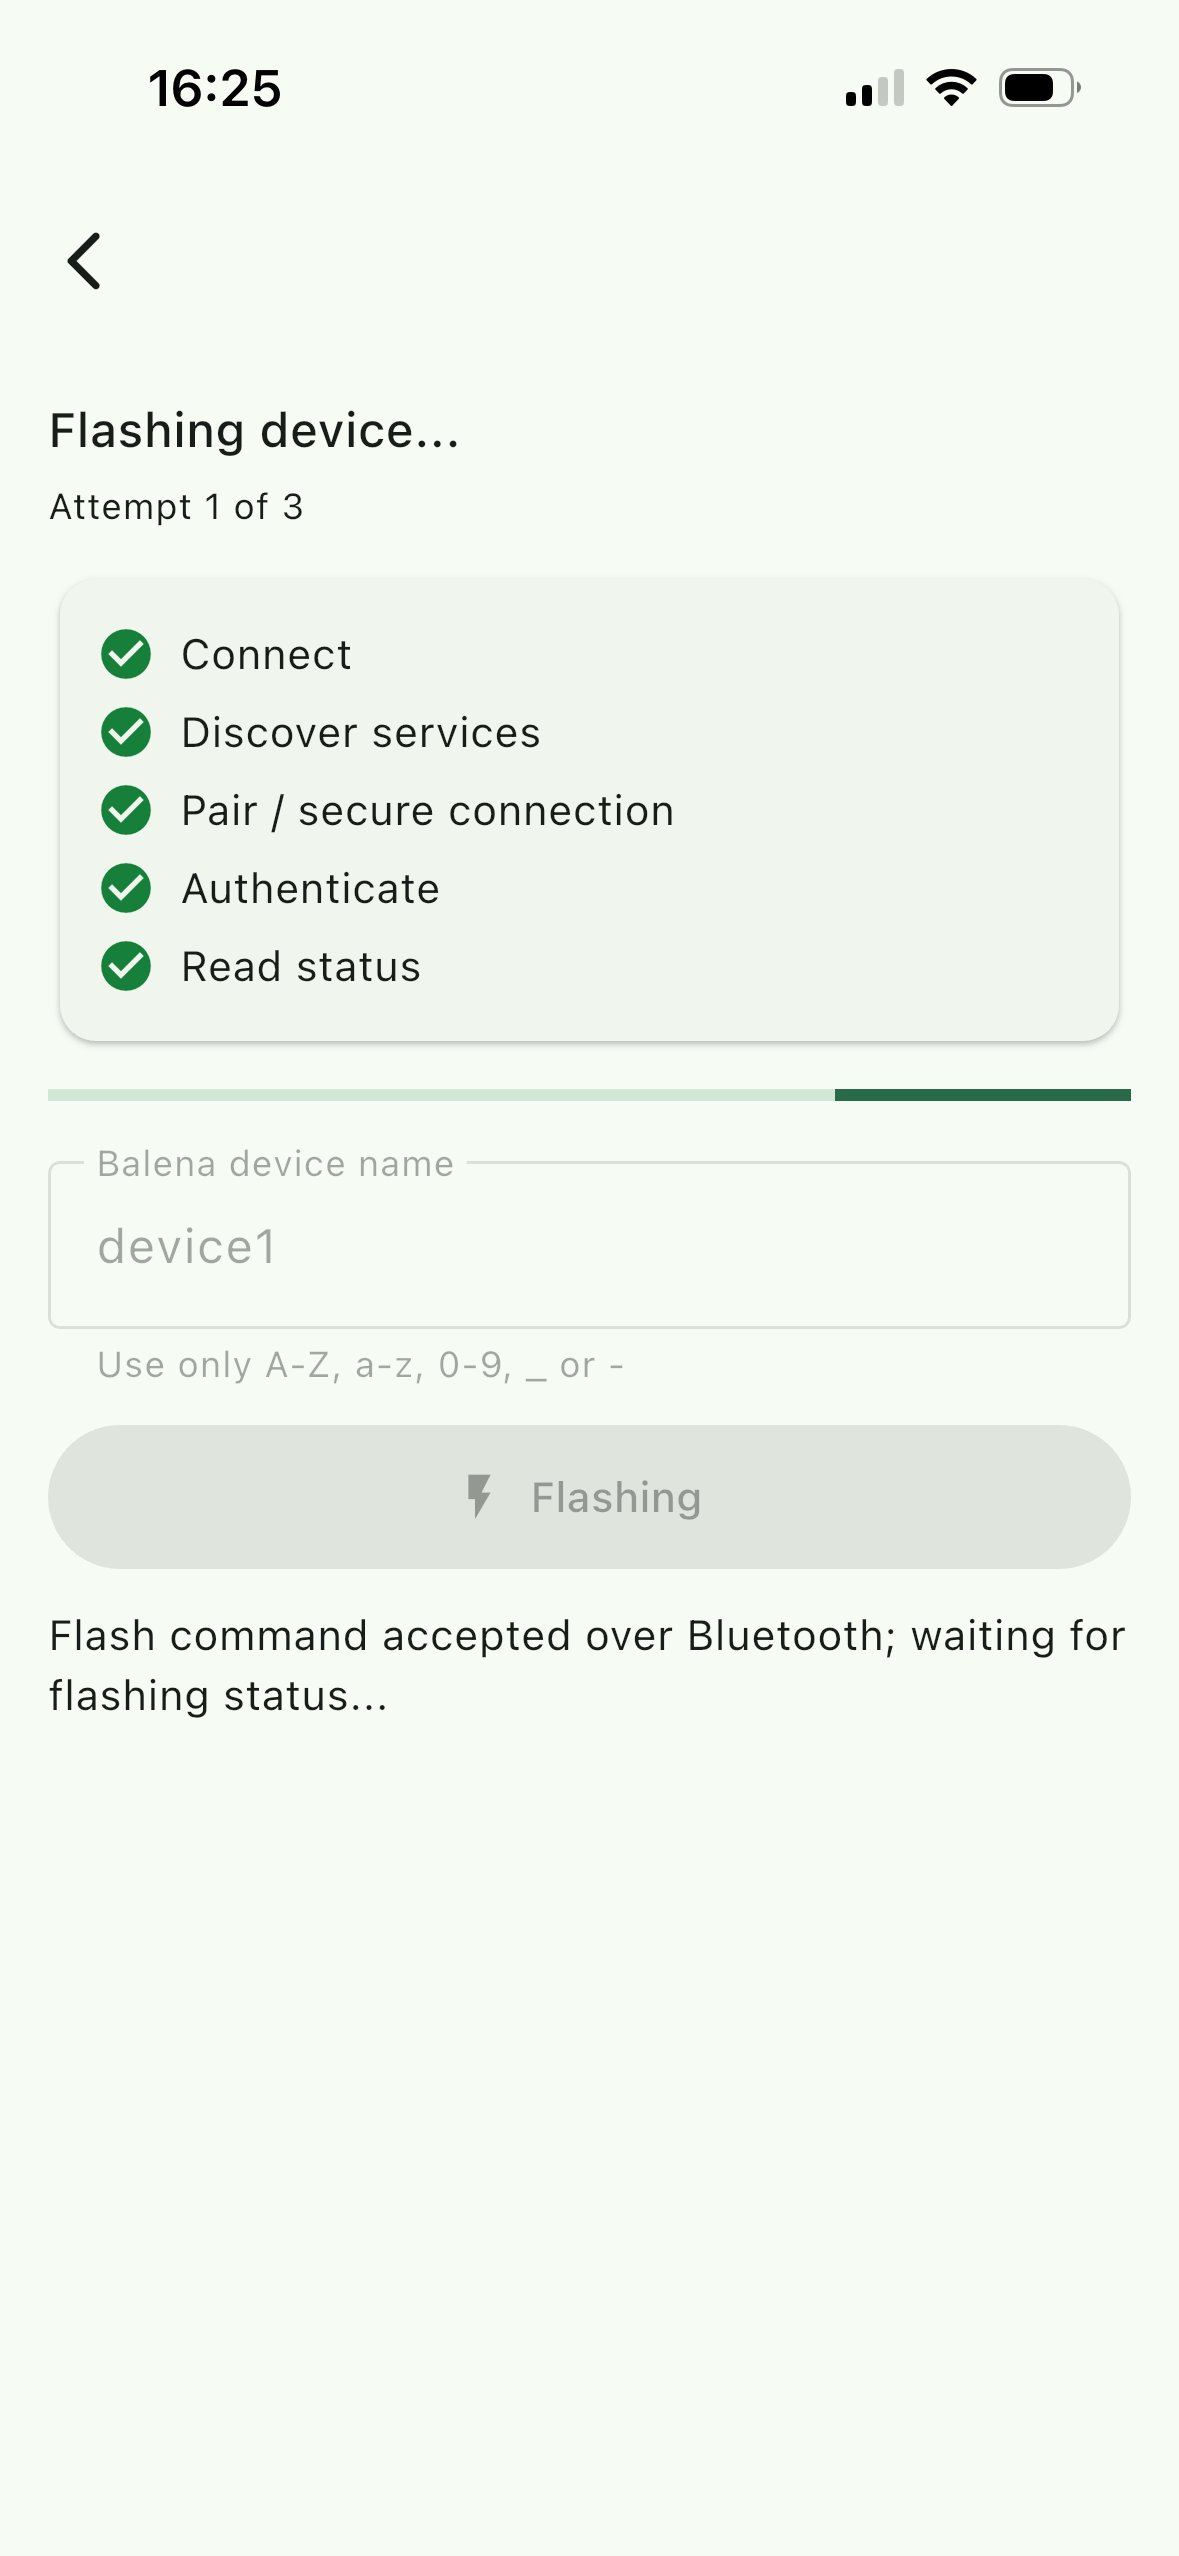
10. Flash the device
As soon as the target is detected, the status changes to “USB device ready to flash” and the Flash button turns green. Tap Flash to start.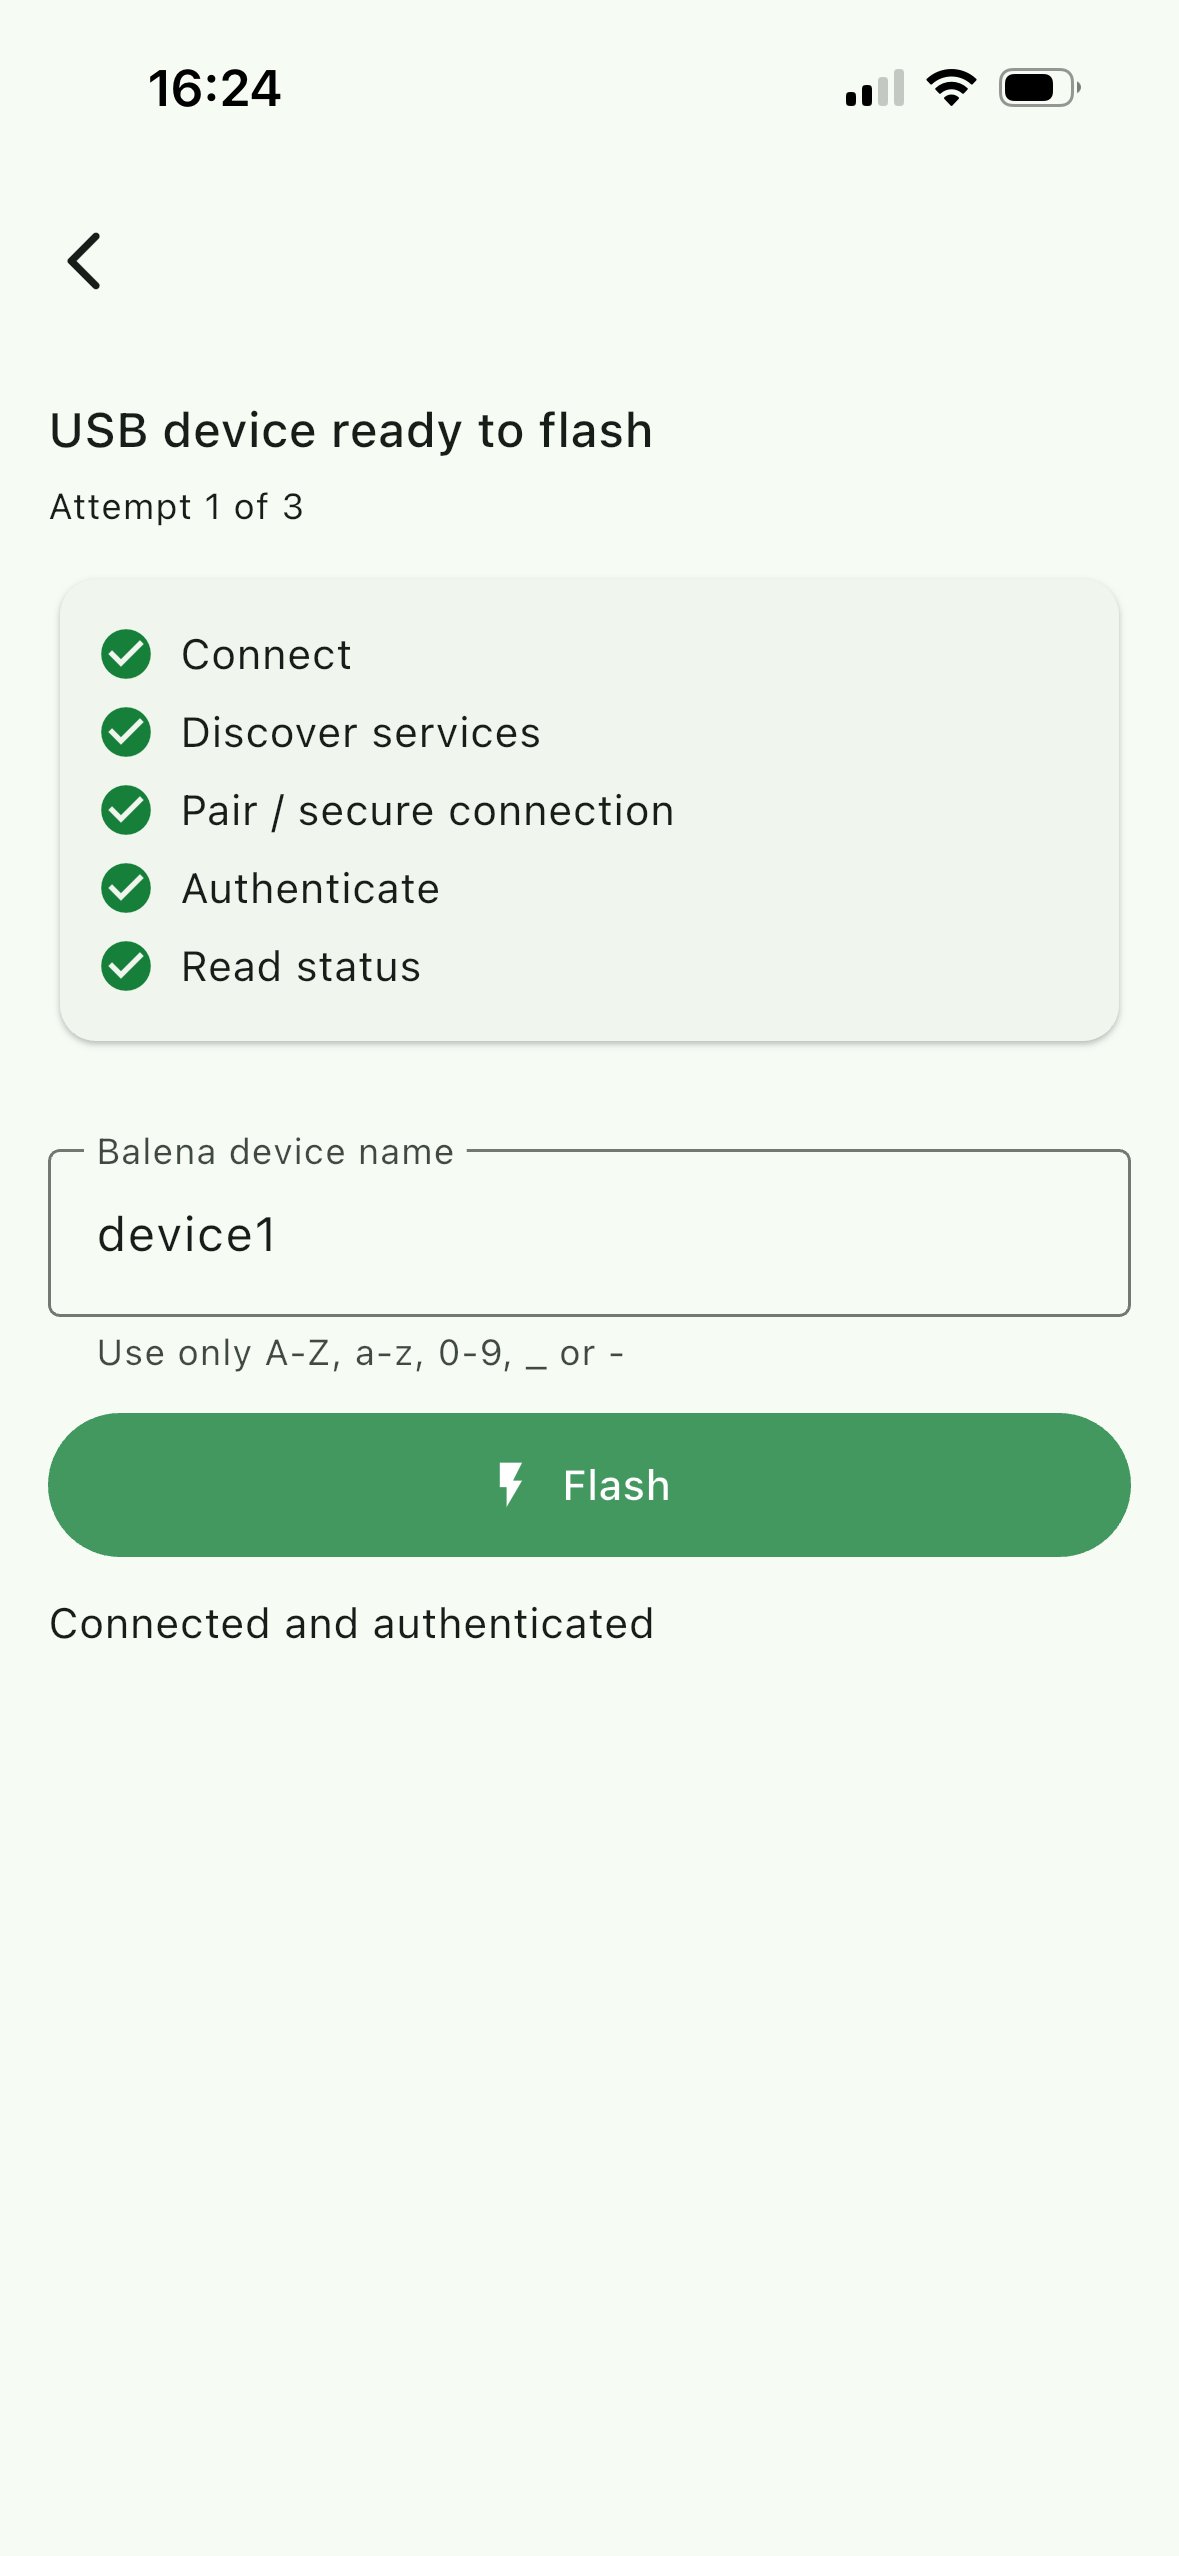
11. Power cycle the target
When you see “Flash complete. Power cycle the USB device…”, the image has been written successfully. Disconnect and reconnect power to the target hardware so it boots from the freshly flashed image.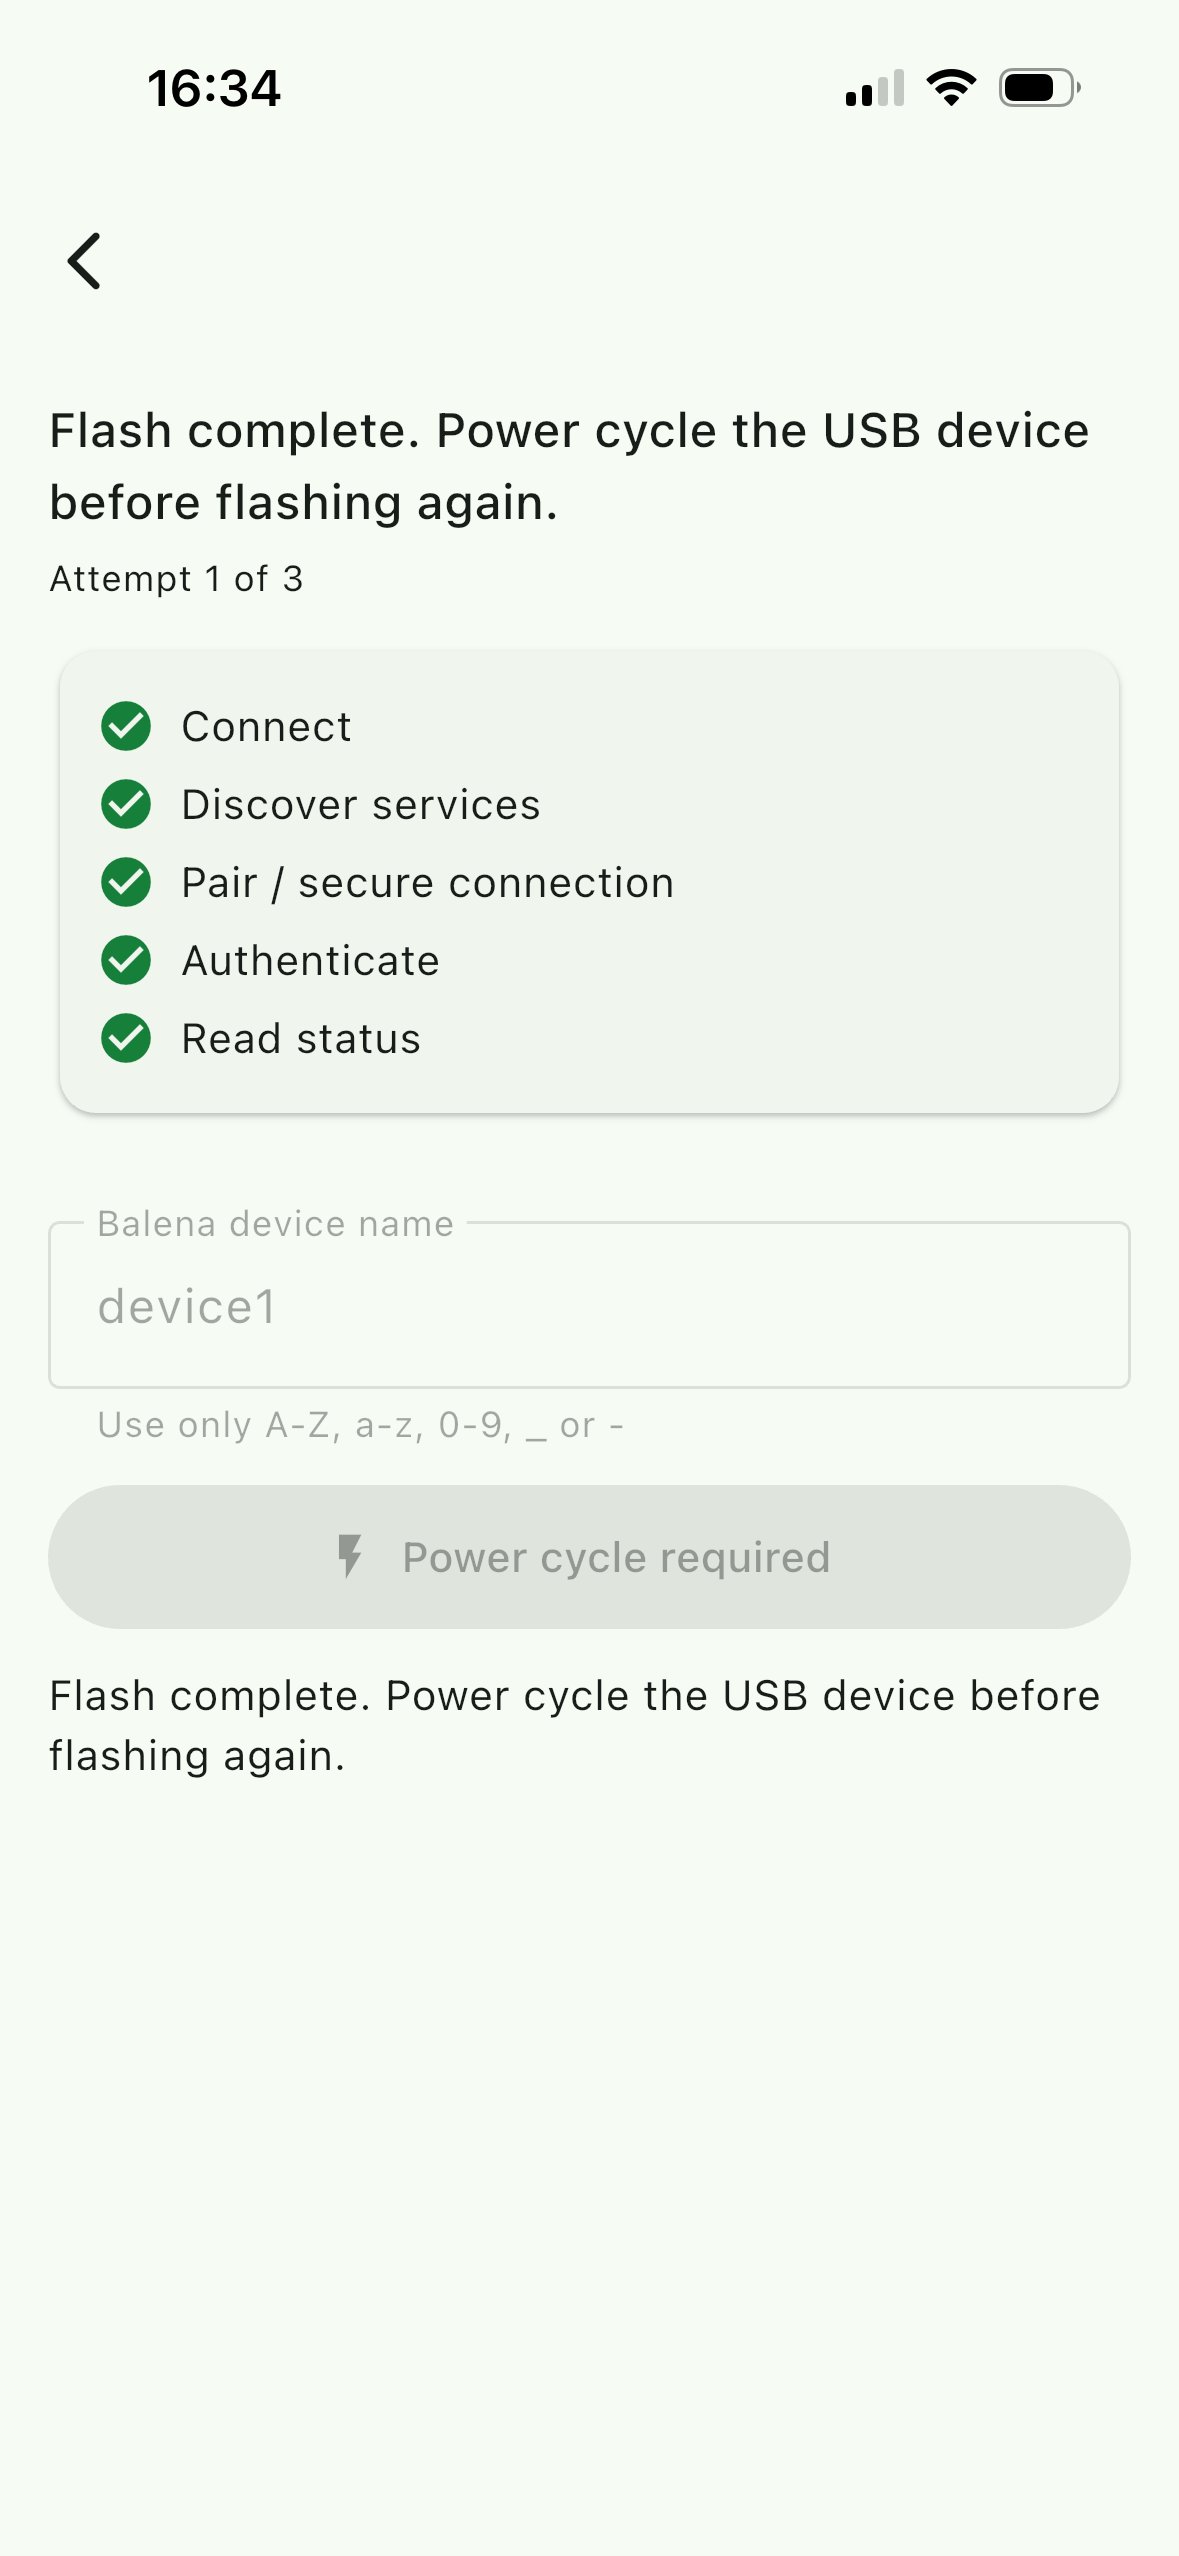
Troubleshooting
No Flash device found. Make sure the onboarding device is powered and within range, that Bluetooth is on, and that you granted the app Bluetooth permission. Keep the scan page open and tap Scan again.
Stuck on “Waiting for a USB device to flash”. Check that the micro-USB cable is firmly seated in both the onboarding device and the target, that the target is powered on, and try a different micro-USB cable if the issue persists.
Flash failed / retrying. The app retries automatically (up to 3 attempts). If it still fails, follow the on-screen prompt to power cycle the USB device before flashing again, then retry.
Next steps
Once the device is online, continue with:- Installation → Main services to understand the agent components.
- Configuration → gRPC/Kafka and the connectors to start collecting data.